I’m not afraid to admit that in the past, I have been quite vehement about never ever having a bed skirt. Traditional bed skirts just aren’t my thing, with their ruffles and often dusty colors. No. But when we moved into our new apartment, 816, we opted to sell our huge bedroom set in order to have a little more space in the boudoir. Because, even though our new bedroom is actually larger in terms of square feet, it’s basically a perfect square which means things just fit differently. So, we sold our first “grown-up furniture” to our newly married couple friends and picked up a cheap, metal bed frame from Wal-Mart. The extra space is glorious! The tacky, brown metal bed frame, not so much.
The first thing we tackled was making a DIY Upholstered headboard to frame out our sleeping quarters. Next, we picked up some new plush bedding. Then it was finally time to address the under belly of the beast.

My focus with any project (as with any!) was to keep it looking like something I purchased and to complete it with as little hair pulling and money spending as possible. For this super simple, straight bed skirt, all three objectives were accomplished!
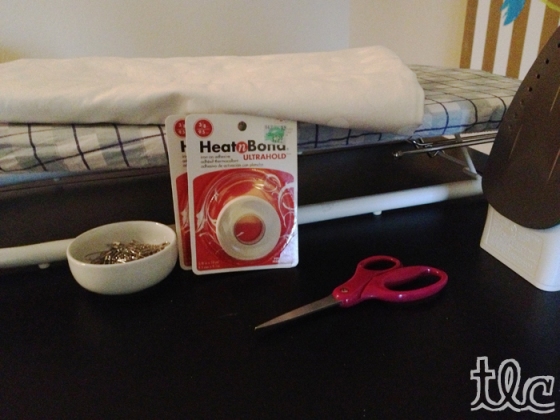
To achieve a similar look you need just a few things! First of all, fabric! I chose white tone-on-tone polka dots. It introduces a new pattern to the room but there are no crazy colors to clash with what’s already going on. Now, as far as measurements go, all I did was measure the three visible sides of our queen size bed which totaled 220” (60+80+80), which equaled just over 6 yards. Then I divided that in half! When you buy fabric, you usually get cuts that are folded in half. I figured I could just cut right down the fold and get the perfect amount of fabric for half the price! I would advise getting ¼ – ½ a yard extra, just in case!
You will also need iron-on hem tape, scissors, safety pins, an iron and an ironing board!
The first thing I did was send my fabric through a wash cycle. It’s best to start out clean! Then I cut my fabric in half long ways to get the length I needed to wrap around the three visible sides of our bed.
All you do then is hem around the edges! When you’re done hemming the long sides, use your no-sew tape to hem the two pieces together, making sure the pair up the “nicest” sides (that way you get the best bottom edge for your skirt. I used two strips of the hem tape for extra durability.
Now, we dress our bed! Since we basically just created a wrap-style bed skirt, you don’t have to remove the whole mattress to put it on! All I did was scoot the mattress over, start in the back corner and safety pin the skirt to the box spring. I moved all the way around, safety pinning about every foot or so and then moved the mattress back into place!
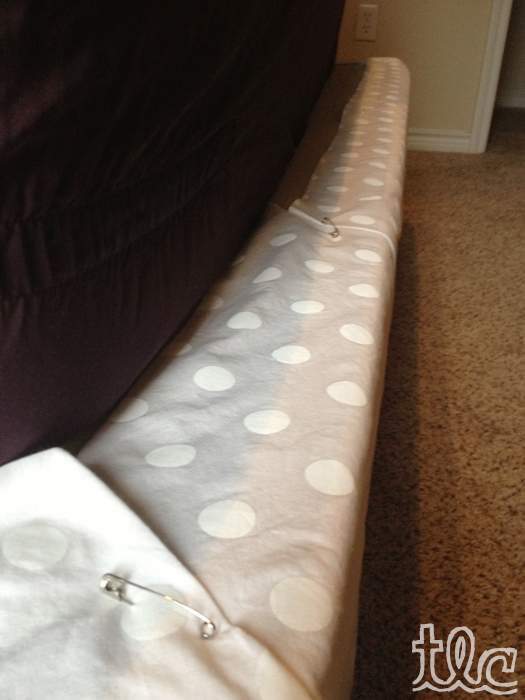
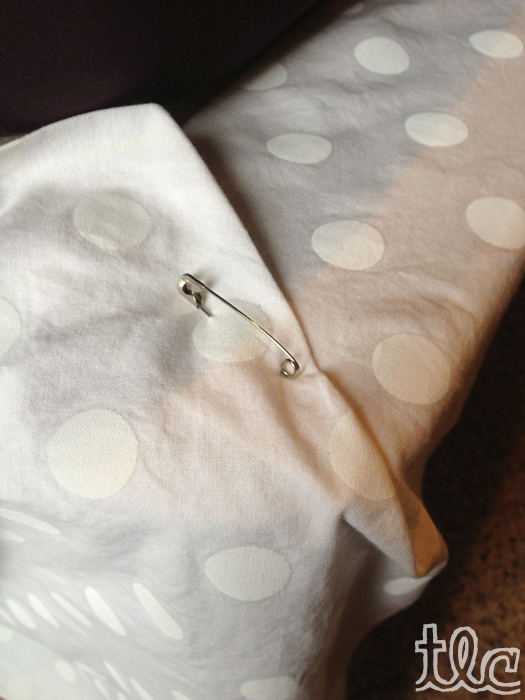
For neat corners, just wrap around and fold the top over. Pin and it’s perfect!
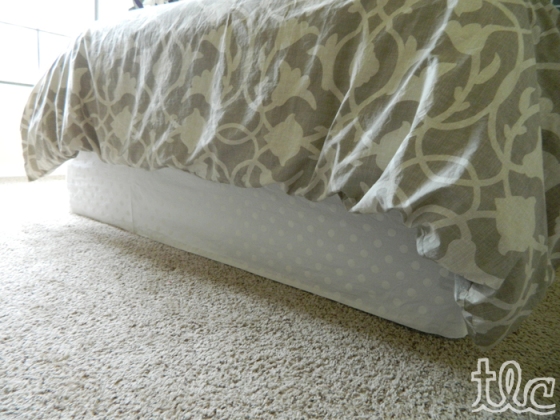
And done! Easily completed in an afternoon. And the best part is, it’s easier to remove than traditional skirts, it’s customized to our décor, and the entire project cost less than $20.00!!
Plus, it just makes such a huge difference! Here’s the before: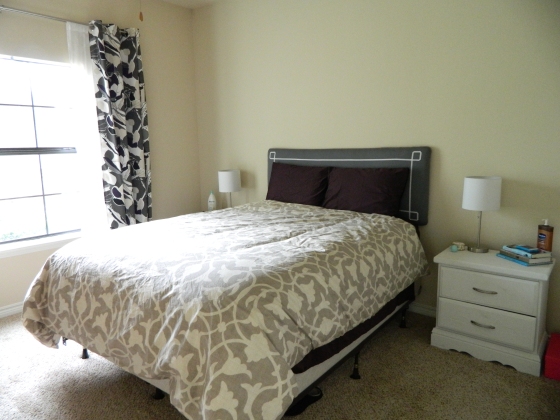
And then the after: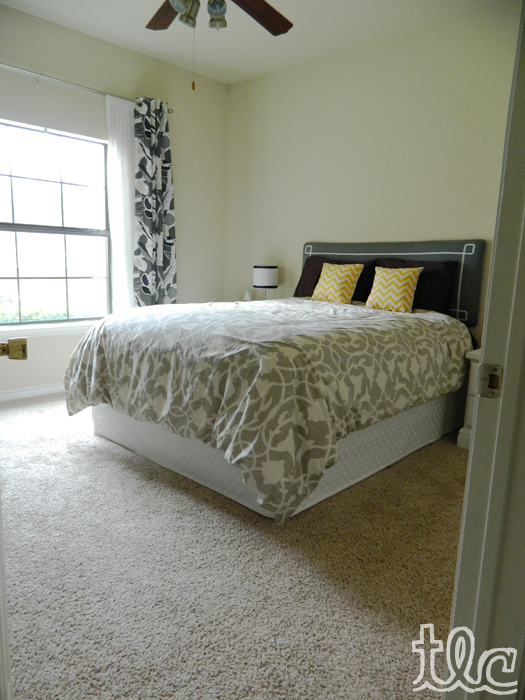
And, if you’re wondering about those cute yellow chevron pillows, “the lazy girl’s custom pillow” is coming up too!
Now that we’ve finished the office, we’re going to be spending a lot more time in the bedroom (in a purely decorating sense, people!). We’ve got plans for some big, DIY art and some major styling all on the cheap (but awesome) plan! So, stay tuned for that!
What sort of fabric projects have you been working on lately? Maybe curtains like our bleach pen designed curtains or our bold, striped curtains? Or something else? Share below!!


