color pops: pretty in pink

First things first! Two Live Colorfully will be moving to self-hosted wordpress-ville this week! So, a Wednesday post may be late or non-existent, but we’re super excited about this change and we think you’re going to like it too!!

Sure, Valentine’s Day is over, but truth be told, I’m a year-round pink lover. Last month, I shared a fun Color Pop collection for True Blue fans everywhere, but today, we’re going full on girly! Plus, I’m sharing a few tips for making pink work in a not-overly-feminine way. Let’s roll.pretty-in-pink-color-pop-2

Painting #03B via LEIF/Watercolor Bouquet of Tulips Print via Yao Cheng Designs/Geometric High Table Lamp/Pink City Maze Pillow and Coral Tall Chevron Pillow via Caitlin Wilson Textiles/Hot Pink Ottoman Makeover via Emily Henderson

I think the key with pink decor (especially if you share your living space with a man!) is moderation. So, even though I know that Josh would never in a million years let me bring that hot pink ottoman in our home, I’m pretty sure a pillow case combined with that pretty abstract painting would be perfectly acceptable.

Also, paired with darker shades of gray or maybe even navy blue, you could make pink fit perfectly in a shared space. I think a perfect example of this is Oh Joy’s house which was styled by Emily Henderson. It’s feminine, but not overly so. If you’re looking for real life inspiration on how to make that combo work, I’d start with her house tour here!

What are your thoughts on pink home decor? Totally fine or way too girly? And what Color Pop Collections would you love to see in the future!?

make this: geometric bedroom art

We’re still moving along in the bedroom and the progress is becoming noticeable! Yay!! Our primary focus right now is getting art up on the walls and adding some style.

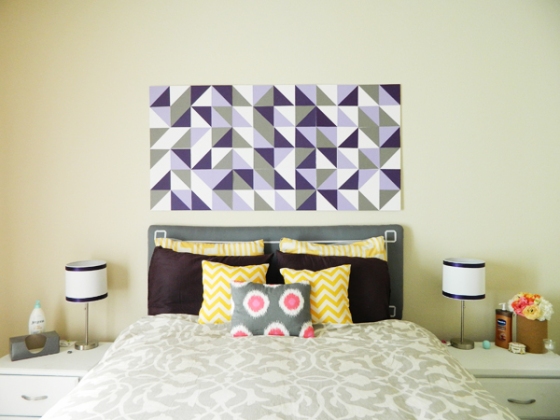
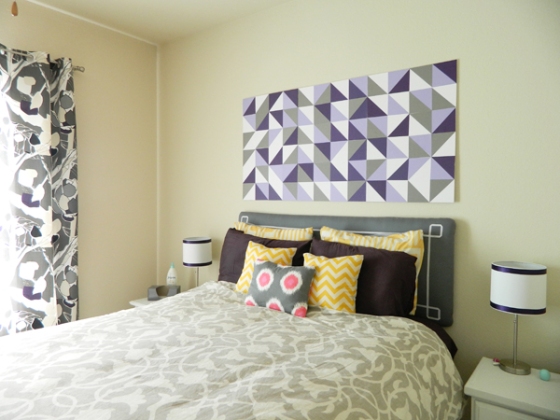
Today, I want to share this fun geometric art project that we completed last weekend. I’ve been loving all the geometric-ness that’s been popping up around Pinterest lately, and this was an easy DIY-able idea that I found on The Red Thread (a blog you should definitely get friendly with). And this thing certainly packs a punch!diy-geometric-bedroom-art-9

Now, in Lisa’s version,  lots of colors works amazingly because her room is largely white. We’ve got a lot going on already with those curtains we snagged at IKEA last year. They are powerful and kind of command the room, so I decided our version would stick within that color scheme: purples, gray, and white.

I also went a little larger. I picked up three foam boards from the dollar store (instead of two) and secured them together vertically. It takes up a lot more visual space this way. I’m thinking of flanking it with some “chill” art above the nightstands would balance out the strictness of the geometric pattern and just about complete this side of the room. diy-geometric-bedroom-art-12

It took about 2 hours and, because it’s all made on foam board, it was super easy to hang. I just used three velcro picture hanging strips (like these) at the top and used sticky tack to secure the bottom corners. Plus, knowing that what’s hanging over our heads at night is not super heavy let’s us sleep a little more peacefully, just in case it does come down. Which it won’t, but still.

What are your favorite DIY art projects? Do you like frames or canvases? Or made from something unexpected? Share below!!

make this: diy match strike votive

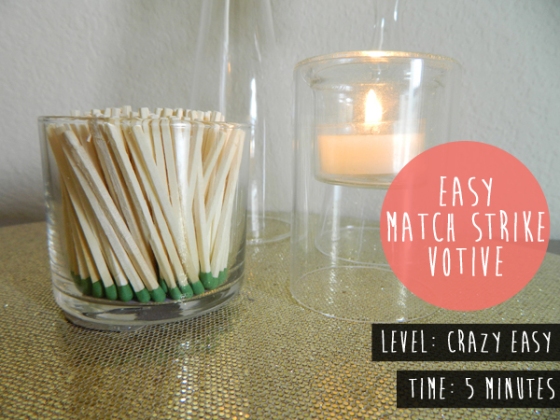
Sometimes the best projects are quick and easy and today I’m sharing a fun one. In a never-ending effort to declutter our apartment (and make it purty!), I’m always looking for ways to decant things into pretty containers. For the most part, labels = lots and lots of visual clutter. So, I made this cute match strike votive.

10-minute-match-strike-votive-promo

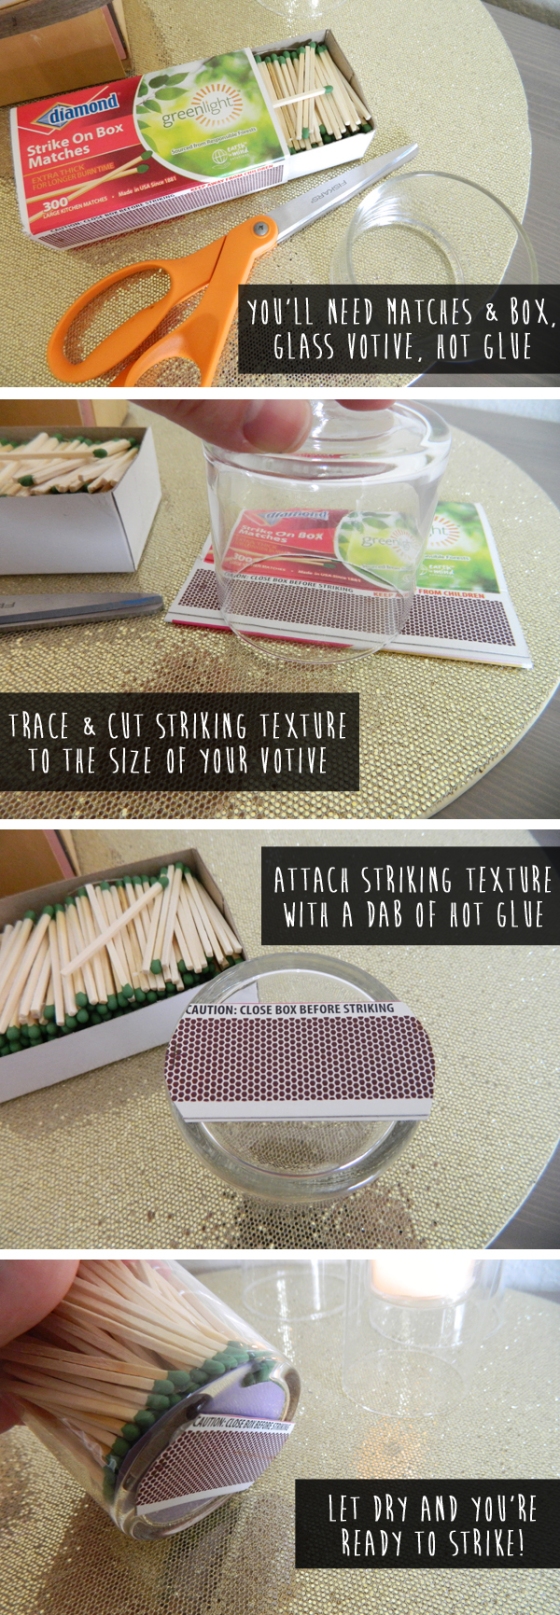
Let me explain. I love me some candles. They immediately make me feel more relaxed and candle light makes everything look amazing, so you’ll find them everywhere in 816. What’s not pretty? Boxes of matches or those long lighters. So I turned some glass thrift store votives into a cute matches storage with an awesome twist! I put the striking texture on the bottom of the votive! Grab your match, strike, and bam! Your candle is lit. (Okay maybe it’s not that exciting but it’s still pretty cool.)

Here are the steps to this quick project!

diy-match-strike-votive-tutorial-2

Easy-peasy, lemon squeezy. It’s not a huge renovation or super crafty project, but it fixed a problem (removing the clutter of labels), made something a little more stylish (always the goal), and it is dang fun to just strike a match on the bottom of that glass. I’ve got three votives around the apartment for easy lightning quick candle lighting… you know, in case you need mood lighting stat!

What are your favorite quick and easy projects?

freebie: kind valentines

It’s the week of Valentine’s and today, I’m bringing you a fun free printable for some kind valentines. I know, I know, I’m way past the school age where handing out valentine’s is expected but I just can’t help myself.

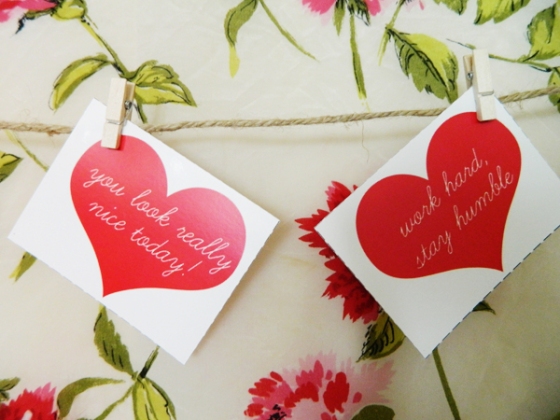
kind-valentines-free-printables-2

So, I made these simple and fun valentine’s in photoshop. They don’t have any names and they aren’t necessarily mushy. They’re just nice.

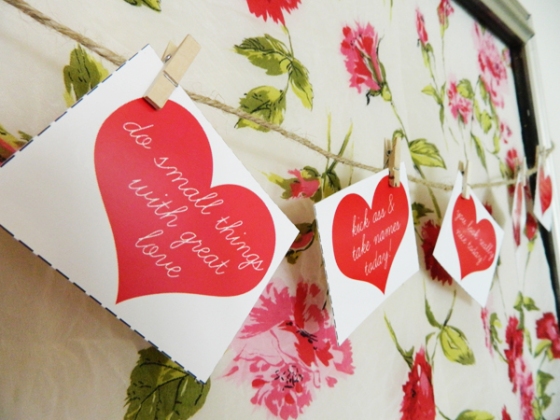
I thought it would be fun to hand them out kind of randomly. On a table at Starbucks, under someone’s windshield wiper, maybe a mailbox or two? This February 14th, I just want to make someone’s day.

kind-valentines-free-printables-7

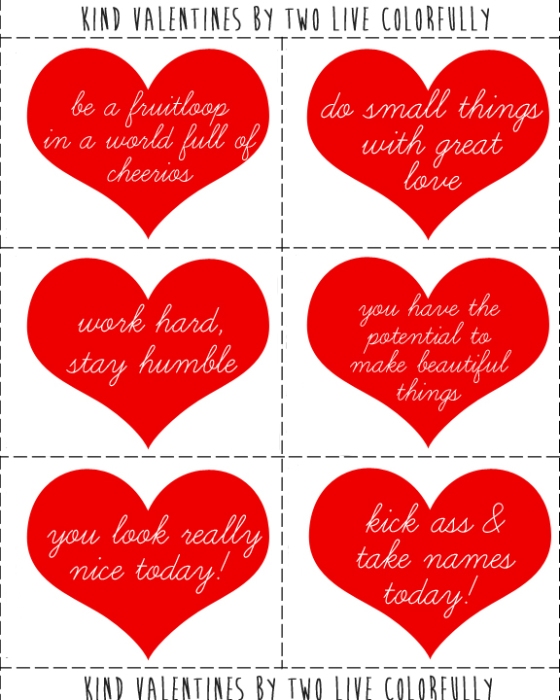
And, here’s a printable for you. You can just cut them out and hand them out to anyone who could use some extra love this week.

kind-valentines-free-printable copy

Download the free printable here!!

What are your plans for Valentine’s Day? J and I usually like to avoid the rush and hang out at home together, and for two home-body dorks, that’s mighty fine!

{I linked up at Home Stories A to Z!}

a colorful life list: meet more bloggers!

Happy happy Friday! I thought today I’d share the first official update on the colorful life list I implemented last month. Plus, I feel like Fridays are the perfect day of the week to share something fun!

Since, I’ve been getting really into blogging lately (because I’ve actually admitted to myself that it’s my dream and why the hell shouldn’t it be?), one of the things I was most excited about on my list was meeting more bloggers in person. This is way harder than it  sounds, but I just knew that there have to be more awesome DIY/home bloggers in the Dallas area than just me.

So, last Saturday was my first blogger date with Savannah of Savannah Smiled.

meet-more-bloggers-savannah-smiled-2

In a sort of weirdo twist of fate, we actually kind of knew each other already. Not only did we both attend the same college at the same time, but our husband’s are in the same teaching program (and both math teachers!). While, Montell (her man) was over at our apartment working on a project with Josh, I recognized him from her blog and put the pieces together. I probably also really freaked him out when I barged into our office and said “YOUR FIANCE IS SAVANNAH”.

So, we met for coffee. Amazing, delicious coffee at Cafe Brazil. I had a raspberry latte and she ordered the rocky road latte.

Seriously people, we talked for four hours without so much as an awkward pause. We chatted up blogs, diy projects, husbands, teaching, and even IKEA. She is the sweetest and I’m pretty sure there will be more coffee dates in our future!

Have you ever met any fellow bloggers in real life? Are you a Dallas blogger too? I’d love to meet more kindred spirits!!

make this: gilded chair makeover

Grab your sand paper, staple guns, and spray paint because it’s makeover time!!! Don’t run away screaming though; we’re talking about a furniture makeover! (Unless you use sandpaper in your beauty routine, then more power to you.) But, today we’re going gold.

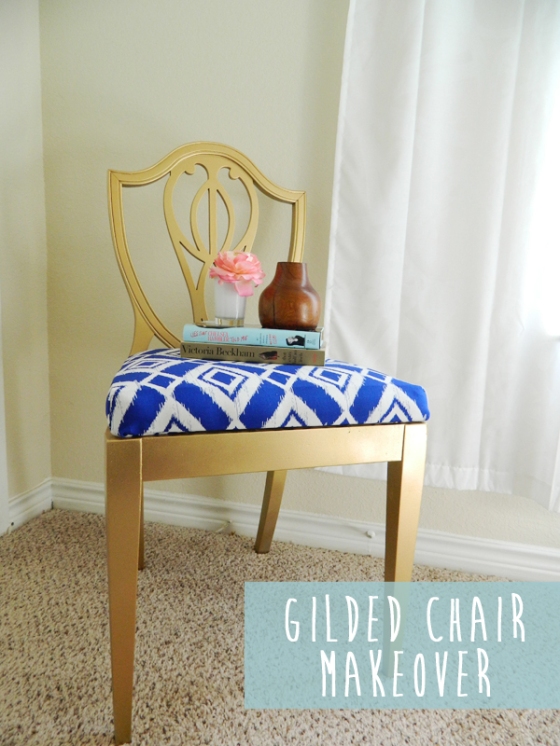
gilded-chair-makeover-1-promo

My obsession with gold is pretty new. For a long time I was against almost all shades of the metallic hue, but now, I can’t get enough of it. From brassy to champagne, it looks amazing in pretty much any space.

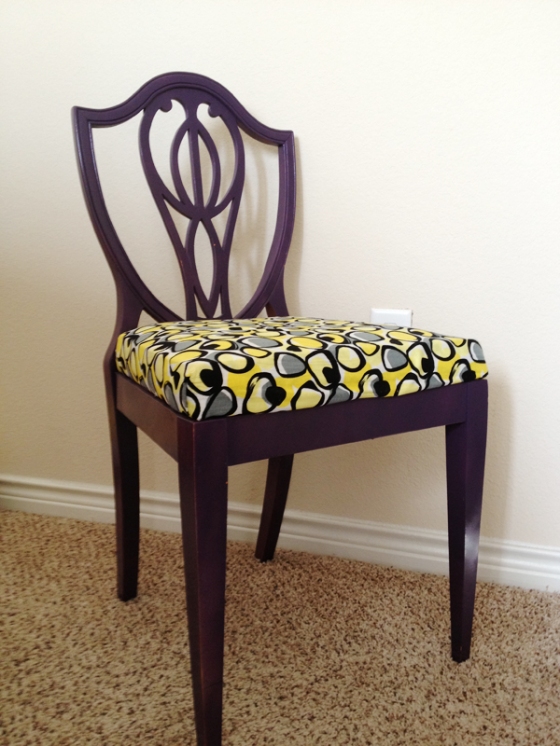
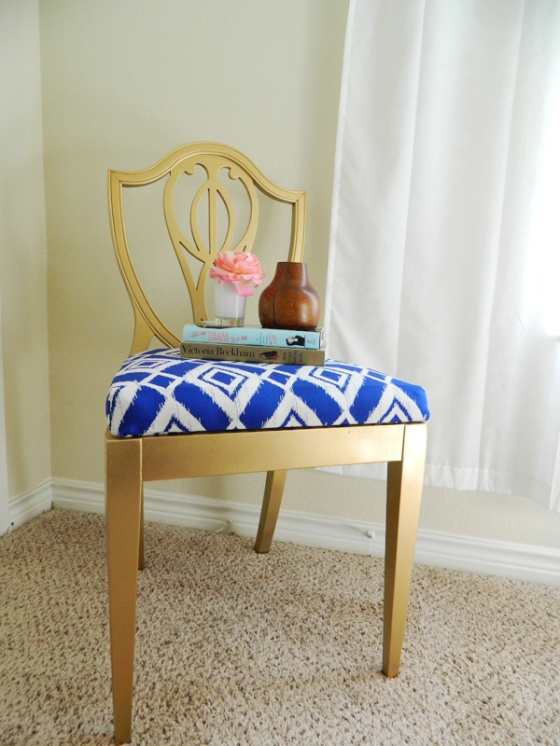
A few years ago, I picked up this fun chair from a thrift store for five dollars. It had such an awesome shape that I couldn’t resist. And, because I was still new at the whole furniture makeover concept, I decided to go crazy. I painted it purple and recovered the cushion in this fun, bold yellow fabric. It was a really fun addition to our previous apartment, but in 816 (our new place), we’ve toned down the decor just a bit. So, for the cost of two cans of metallic spray paint and a yard of fabric, we made over this crazy chair into a fabulous place to park it.

gilded-chair-makeover-before

But enough stalling! No makeover story is complete with mid-transformation montage (a la every 90’s teen rom-com ever!) So, here’s what we did!gilded-chair-makeover-before (5)

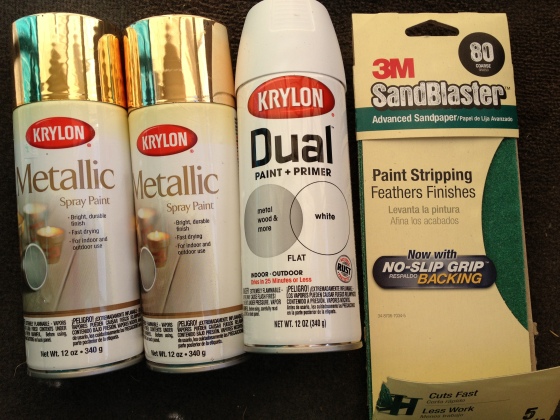
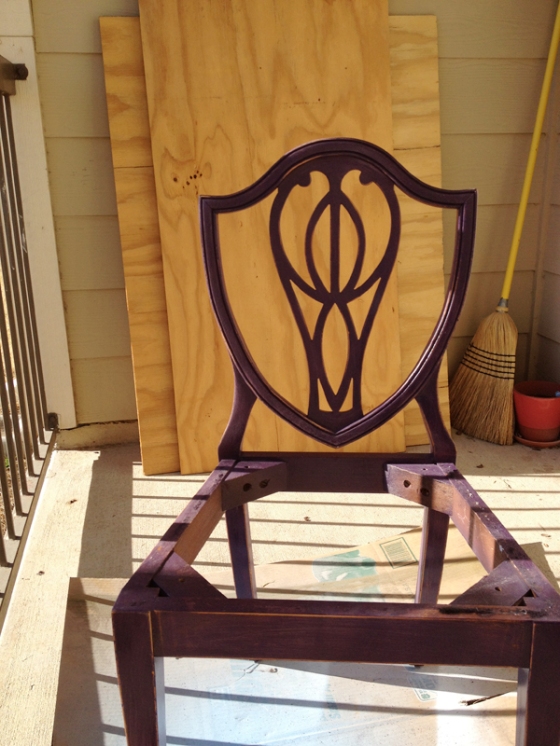
The first step is pretty much any furniture makeover, is sanding and primer. I found this awesome paint stripping sand paper and gave the chair a good scuffing (no dirty jokes here, please!). Then, after wiping it down with a wet cloth and letting it air dry, we moved on to priming.

gilded-chair-makeover-before-6

Then, after wiping it down with a wet cloth and letting it air dry, we moved on to priming. Another benefit to priming when you’re going metallic is that it gives you a white base to build on. If I had just sprayed the gold over the purple, I probably would’ve ended up with a less vibrant gold or I would have had to do more coats. Just remember, white base = best!

I used Krylon’s metallic gold spray paint and it worked fantastically. Truth be told, one can would have done it, but I broke the seal on the second can for good measure. I’ve got a lot left, but what girl doesn’t want more metallic gold spray paint on hand? You know, for emergencies.

While the chair cured outside on our patio for several hours, I turned my attention to the cushion. No pictures here, because it was that easy, I removed the yellow fabric, and stapled the ikat fabric to the cushion. No piping or batting needed here! I would recommend going with a thicker fabric (mine is a duck fabric which is kind of like canvas). It tends to hold its shape and you can pull it very taught without distorting the pattern much.

And, here she is.

gilded-chair-makeover-1

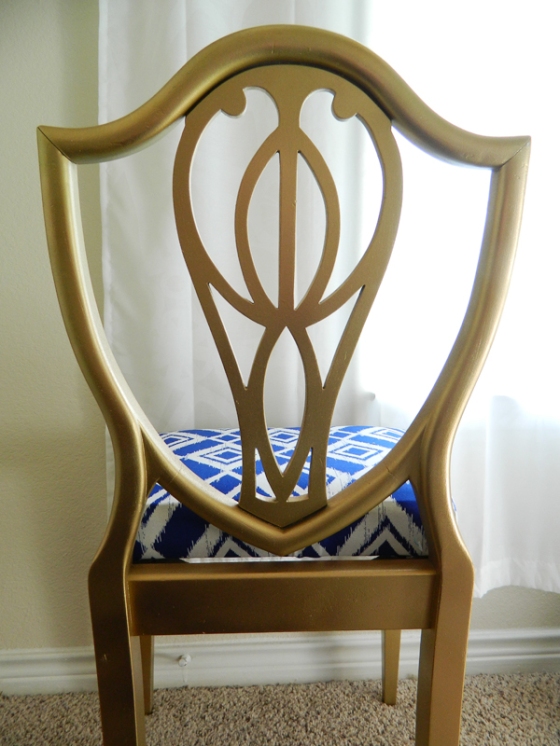
The blue fabric is such a perfect compliment to the gold, right? And I can’t help but show a photo of the back of the chair. The shape is so pretty and I just love it!

gilded-chair-makeover-3

We’re moving along on my goal to get this apartment whipped into shape, and this lovely gal fits right in!

What are your thoughts on furniture makeovers? Worth the extra work or not? Do you have a favorite on of your own? Share below!

{I linked up at Home Stories A to Z!}

hi valentine!

February is here! Which means that the day for all things love is swiftly approaching. (Valentine’s day, people!) And to get us in the spirit of hearts and chocolates and warm feelings, I’m sharing our Valentine’s décor!

With the exception of Christmas (where all bets are off), I think just a sprinkling of festivity is perfect for any holiday. In most cases I use things that I’ve already got around the house to create little vignettes and maybe throw in a couple of easy, inexpensive crafty projects and then call it a day. Quick and easy swaps are the name of the game!

valetines-decor

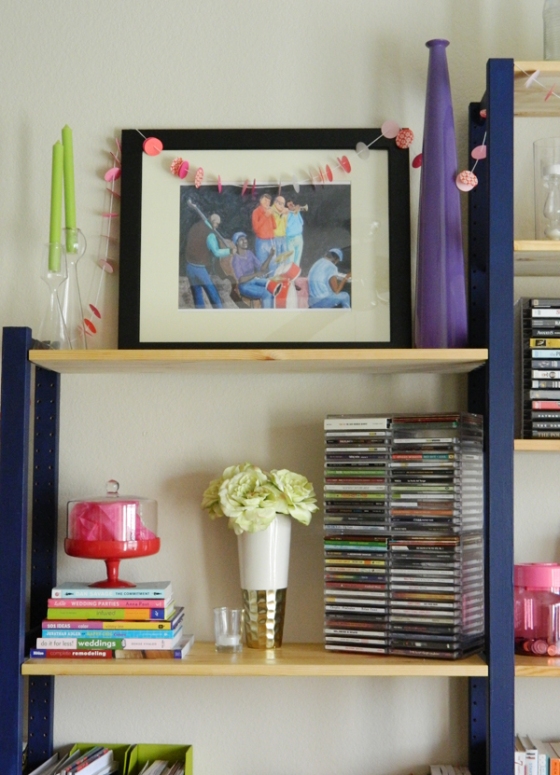
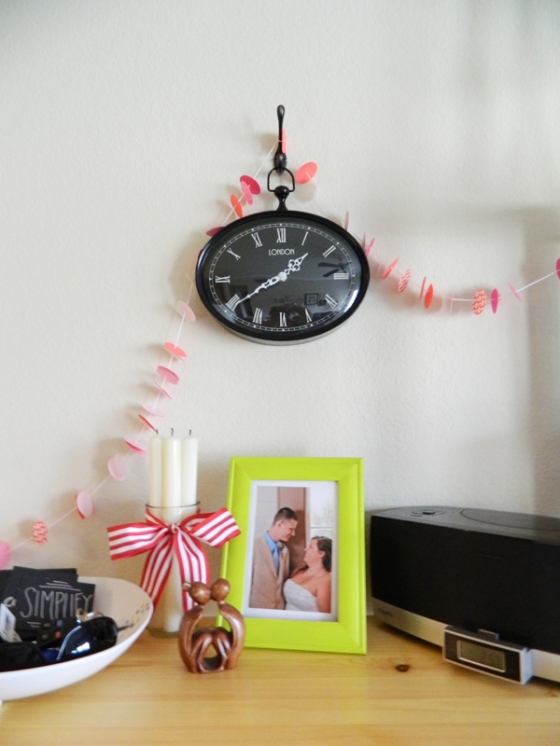
With a circle punch, some twine, and all the pink paper I could scrounge up, I made this festive confetti garland to drape over our bookcase.

I also added the red, mini cake plate filled with pink tissue paper into our bookcase accessories and the red and white striped ribbon on the candle vase transitioned perfectly from Christmas to Valentine’s.

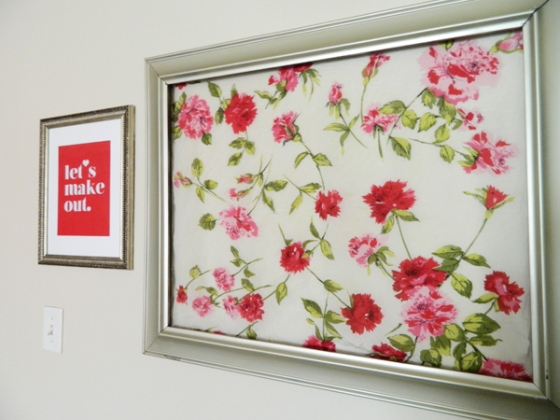
valentines-confetti-garland In our rotating frames in the dining room, I hung one of my vintage scarves with a gorgeous pink and red floral pattern. And next to that, I whipped up a cheeky print in photoshop and had it printed up at staples. (I actually found that idea from DESIGNLOVEFEST on Pinterest and just happened to have that same font on my computer so I fashioned one of my own!).

Valentines-Day-Print

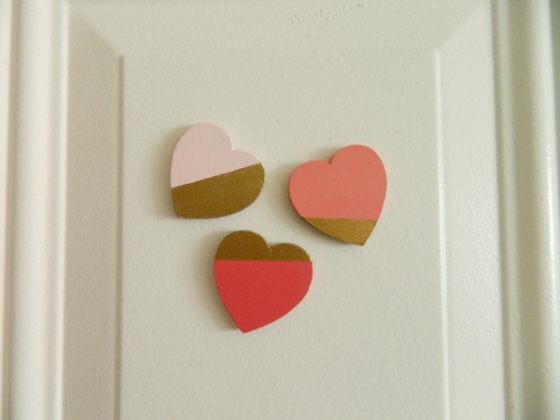
And, remember those cute painted wood ornaments I made for our Christmas tree? That I then turned into magnets? Well, I went ahead and made another variation. I found these awesome wooden heart shapes at Hobby Lobby and decided to make some love-y magnets especially for this month. Just a little craft paint and those self-adhesive magnets is all it takes!
Painted-Heart-Magnets-Valentines

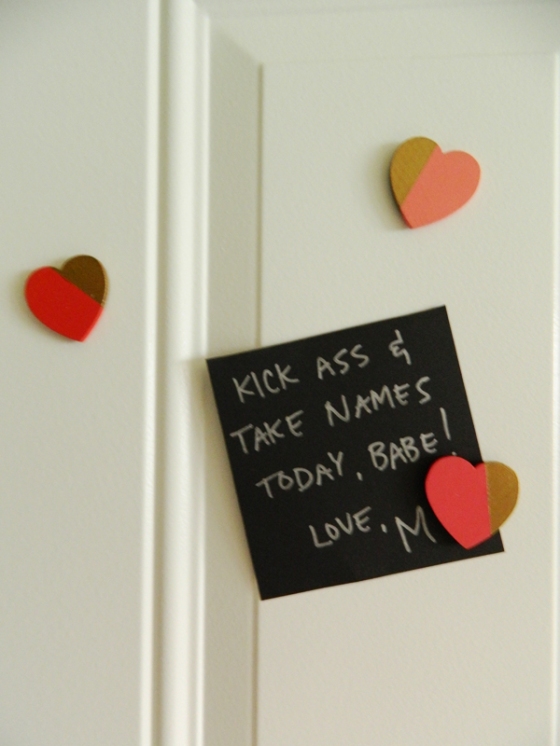
In a stroke of luck, we discovered that our front door is actually magnetic, so I used these cute little hearts to hang up tiny love notes for Josh to see as he leaves in the morning.
Painted-Heart-Magnets-Valentines-2

Just a few little tweaks made our apartment v-day ready! For us, February is a big month. We celebrate Valentine’s, our half anniversary, and Josh’s birthday! So extra little touches of appreciation and mushy-ness go a long way!

Did you decorate for Valentine’s day? Do you have any traditions or fun activities planned? Share with us!!

this isn’t your grandma’s coat

Alright, y’all. Today we’re doing the unofficial Mackelmore Thrift Shop challenge with Young House Love! (If you haven’t heard this song, you need to. It’s hilarious! You can find the cleaned up version here.) The rules are simple! Go thrift shopping, $20.00 in yo’ pocket, find something awesome, and document said awesome-ness with gratuitous photos of your ‘ghetto’ face.

So, last Saturday, I headed to “Thrift Town” which is right down the road for me and set out for greatness. Oh boy did I find it.

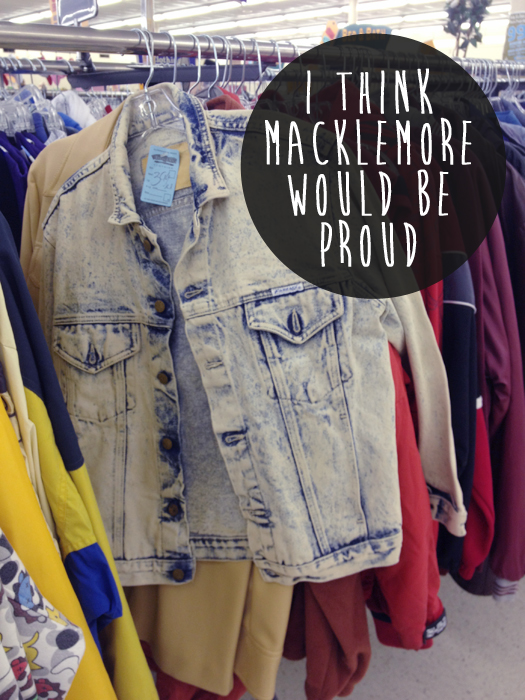
thrift-shopping-challenge-1For those of you who might not know, “greatness” can often come in the form of acid washed denim jackets. I know it’s not part of the song, but I really think Mackelmore himself would be proud to don this!

thrift-shopping-challenge-7-copy

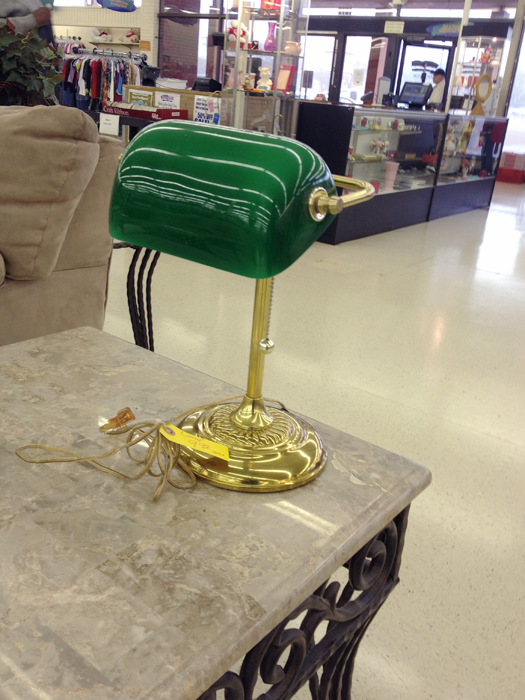
Really though, I found this awesome desk lamp with a pop of bright green. The first thing I thought of when I saw it was Emily Henderson. I could totally see this beauty being worked into one of her amazing rooms. It was only $9.99 and in great shape, but I resisted the temptation. Truth be told, I don’t need another lamp and after a solid 5-7 minutes of pacing around it, carefully balancing the pros and cons of stylish lighting, I backed away slowly.

thrift-shopping-challenge (8)

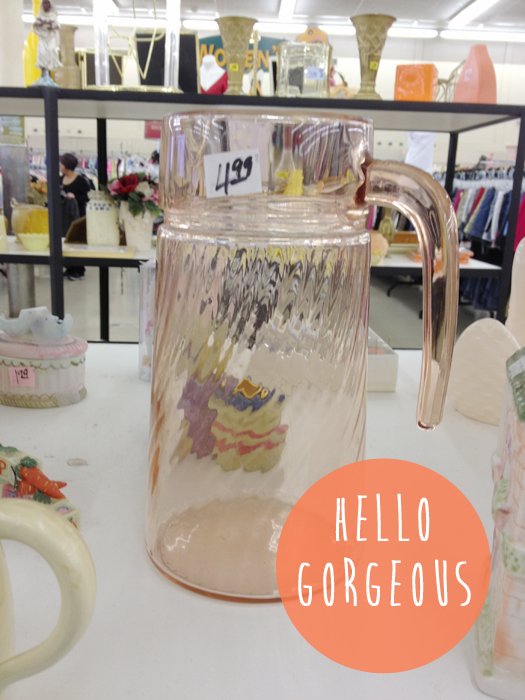
Luckily, I was distracted by fate. My greatest find was this gorgeous, vintage pink pitcher for just $4.99!! Not a scratch, dent, or ding on it and now, it’s all mine! It’s smaller than a standard picture but I think it would be perfect for summer cocktails for two on our patio, as a vase for fresh flower, or it might even live in our bedroom to save us late nite trips to the kitchen for a glass of water. It’s the only thing I purchased with my $20 bones but I am mighty proud!thrift-shopping-challenge-3

And, I just couldn’t resist giving it a little fashion show after I got it home and cleaned up.

pink-vintage-pitcher-2

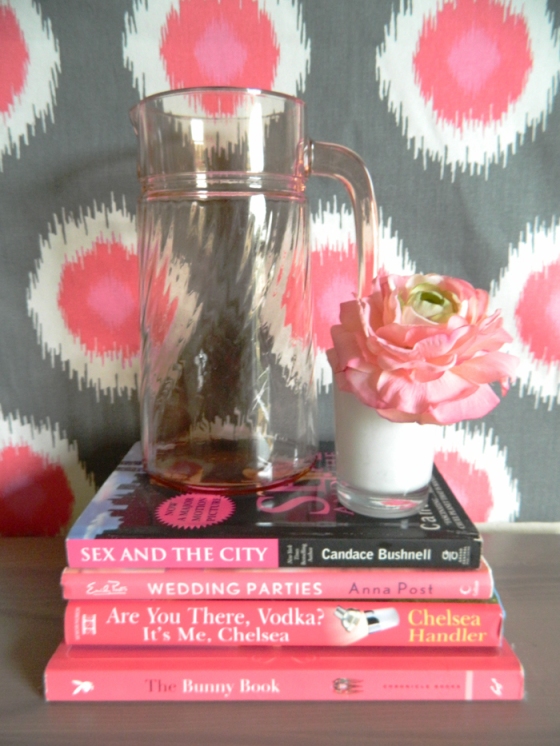
A stack of books, a flower, my  pitcher, and some fun fabric all in pink just makes my day!! Plus, on this first day of February, it is quite appropriate! (PS. You’ll also be seeing this fabric come back into play with an upcoming project!!)

Did you participate in the thrift shop challenge? Or do you just have any awesome/hilariously un-awesome thrifting finds to share? Let’s hear it!!

make this: the lazy girl’s diy bedskirt

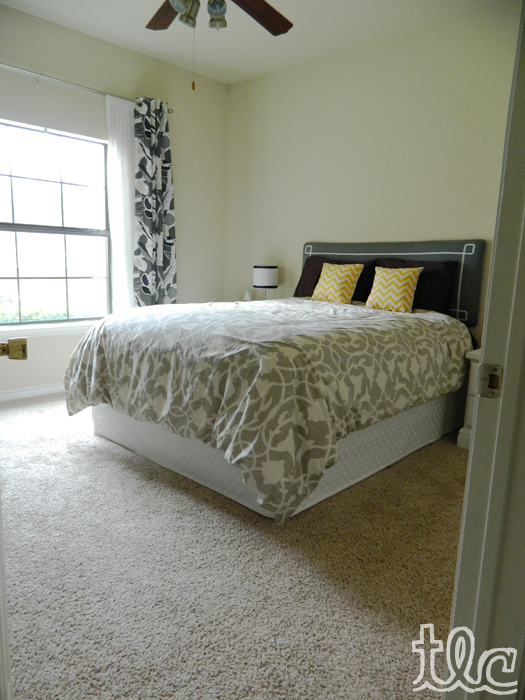
I’m not afraid to admit that in the past, I have been quite vehement about never ever having a bed skirt. Traditional bed skirts just aren’t my thing, with their ruffles and often dusty colors. No. But when we moved into our new apartment, 816, we opted to sell our huge bedroom set in order to have a little more space in the boudoir. Because, even though our new bedroom is actually larger in terms of square feet, it’s basically a perfect square which means things just fit differently. So, we sold our first “grown-up furniture” to our newly married couple friends and picked up a cheap, metal bed frame from Wal-Mart. The extra space is glorious! The tacky, brown metal bed frame, not so much.

The first thing we tackled was making a DIY Upholstered headboard to frame out our sleeping quarters. Next, we picked up some new plush bedding. Then it was finally time to address the under belly of the beast.

diy-no-sew-bedskirt-promo

My focus with any project (as with any!) was to keep it looking like something I purchased and to complete it with as little hair pulling and money spending as possible. For this super simple, straight bed skirt, all three objectives were accomplished!

To achieve a similar look you need just a few things! First of all, fabric! I chose white tone-on-tone polka dots. It introduces a new pattern to the room but there are no crazy colors to clash with what’s already going on. Now, as far as measurements go, all I did was measure the three visible sides of our queen size bed which totaled 220” (60+80+80), which equaled just over 6 yards. Then I divided that in half! When you buy fabric, you usually get cuts that are folded in half. I figured I could just cut right down the fold and get the perfect amount of fabric for half the price! I would advise getting ¼ – ½ a yard extra, just in case!

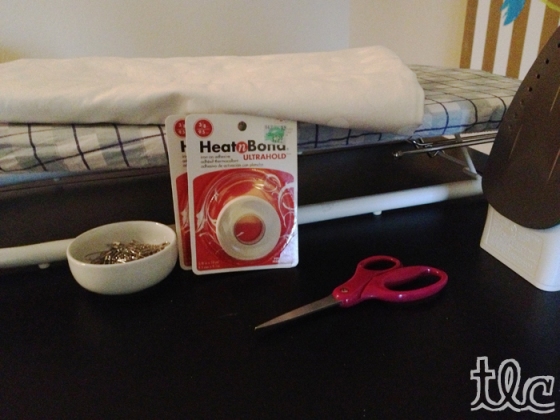
You will also need iron-on hem tape, scissors, safety pins, an iron and an ironing board!
diy-no-sew-bedskirt-7-copy

The first thing I did was send my fabric through a wash cycle. It’s best to start out clean! Then I cut my fabric in half long ways to get the length I needed to wrap around the three visible sides of our bed.

All you do then is hem around the edges! When you’re done hemming the long sides, use your no-sew tape to hem the two pieces together, making sure the pair up the “nicest” sides (that way you get the best bottom edge for your skirt. I used two strips of the hem tape for extra durability.

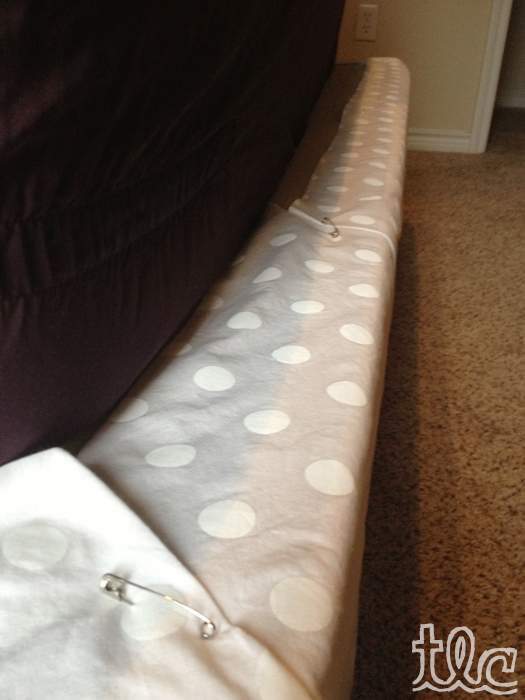
Now, we dress our bed! Since we basically just created a wrap-style bed skirt, you don’t have to remove the whole mattress to put it on! All I did was scoot the mattress over, start in the back corner and safety pin the skirt to the box spring. I moved all the way around, safety pinning about every foot or so and then moved the mattress back into place!
diy-no-sew-bedskirt-11

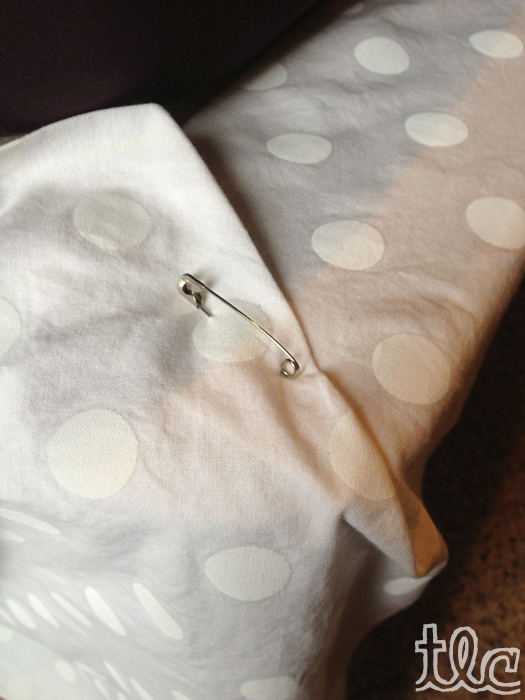
For neat corners, just wrap around and fold the top over. Pin and it’s perfect!
diy-no-sew-bedskir-corners

And done! Easily completed in an afternoon. And the best part is, it’s easier to remove than traditional skirts, it’s customized to our décor, and the entire project cost less than $20.00!!
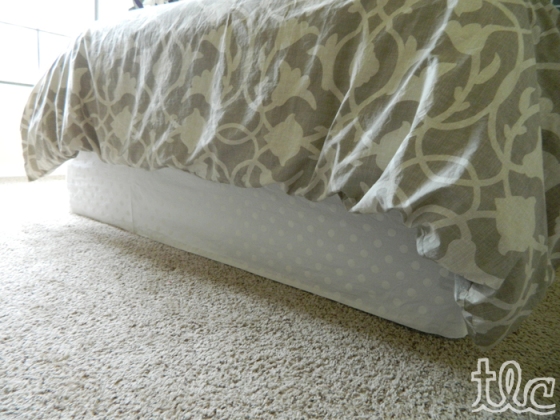
diy-no-sew-bedskirt-4-copy

Plus, it just makes such a huge difference! Here’s the before:DSCN1617
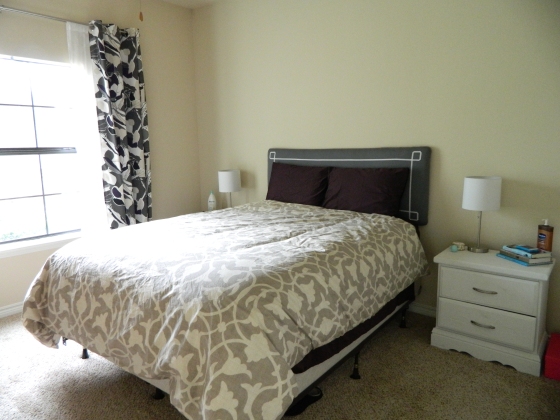
And then the after:diy-no-sew-bedskirt-copy

And, if you’re wondering about those cute yellow chevron pillows, “the lazy girl’s custom pillow” is coming up too!

Now that we’ve finished the office, we’re going to be spending a lot more time in the bedroom (in a purely decorating sense, people!). We’ve got plans for some big, DIY art and some major styling all on the cheap (but awesome) plan! So, stay tuned for that!

What sort of fabric projects have you been working on lately? Maybe curtains like our bleach pen designed curtains or our bold, striped curtains? Or something else? Share below!!

that’s a wrap: office reveal

So, the office is done. Well, mostly done. There are still a few finishing touches I have planned, but for the most part this room is finished. You might remember what it looked like just a few weeks ago but now, it’s clean, it’s organized, you can actually walk through it without fearing for your life. Overall all, I’d call that a success.

Now, let’s take the tour!
The most obvious change is the fact that you can actually see the floors! (Carpet! Who knew?)

finished-office-makeover-6

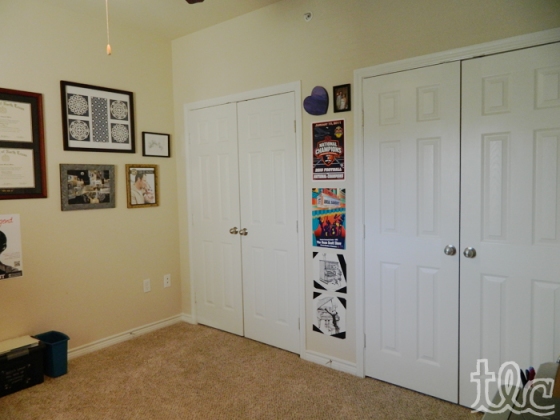
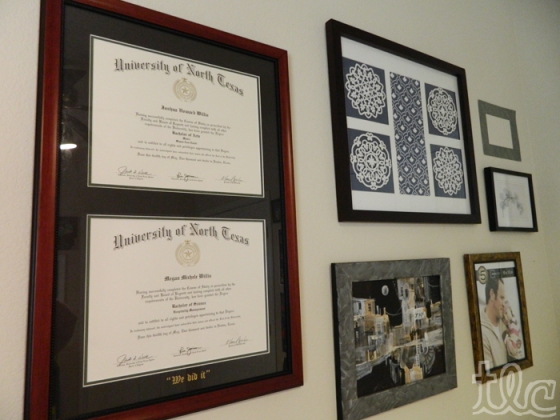
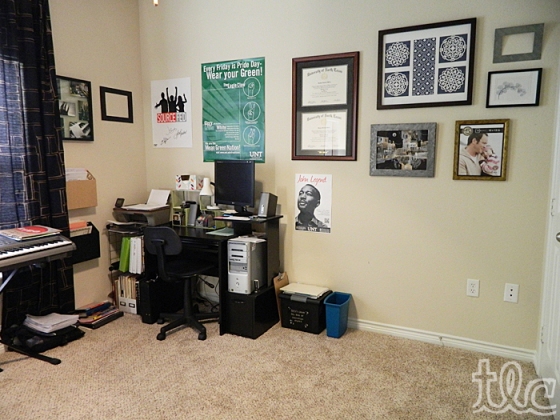
I finally hung up all of the art and frames that we own. There’s still quick a bit of empty space (and yes, that one frame still has the advertisement photo in it), so we’ve got room to grow, but stuff is on the walls which is the main focus! When Josh and I graduated from college, his dad got us a double frame which now houses both of our diplomas which is pretty cool.

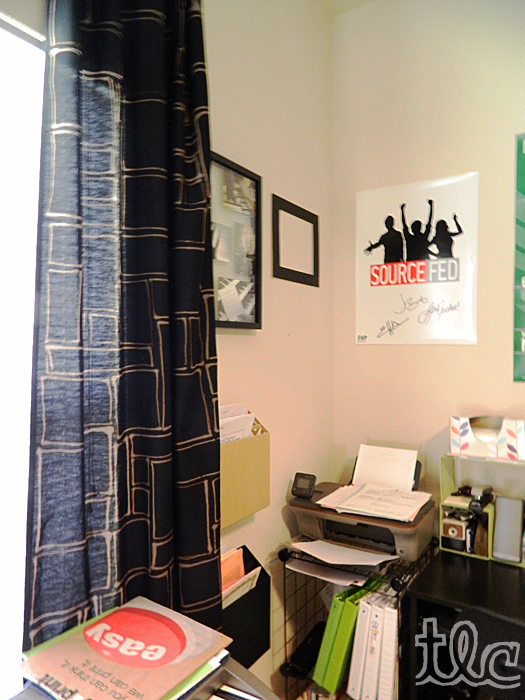
ffinished-office-makeover-4By the window is Josh’s workspace. Being a first year teacher, he is in here a lot, so it doesn’t stay neat for long, but he did put in some creative storage solutions like the hanging file folders and wire shelving next to his desk.finished-office-makeover-5

Here, you can see the curtains I designed with bleach pens and also one of the Christmas presents I got for Josh, a signed Source Fed poster (which is a news program we watch on YouTube that is hilarious, but still super informative!!)

finished-office-makeover-3

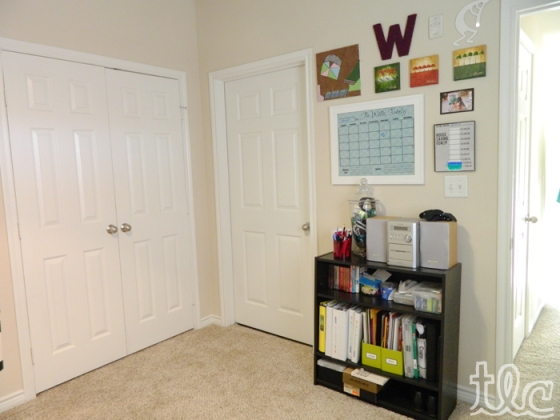
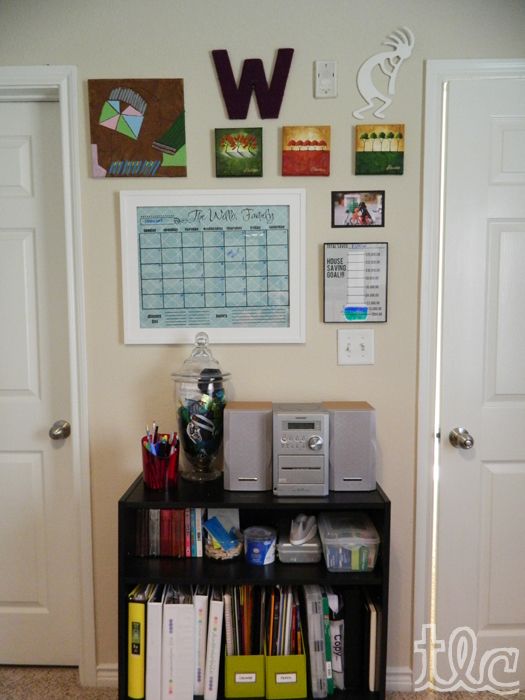
On the opposite wall is our family calendar (which we snagged on etsy) and more art.finished-office-makeover-1

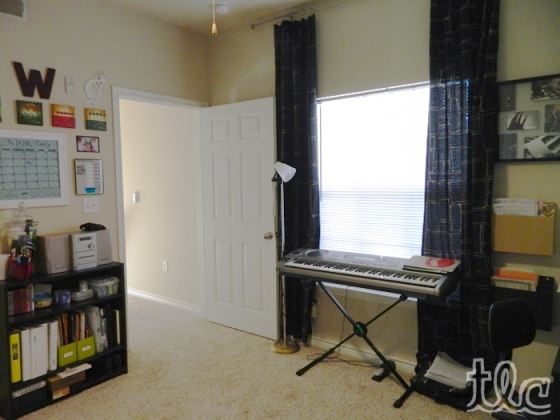
This small bookcase serves as storage for binders and all office supplies.finished-office-makeover-7And, in the last turn, we’ve got the door and Josh’s keyboard. You can also see that we hung the curtains super high which makes the ceilings look taller and also takes up that empty visual space about the window and doors.finished-office-makeover-2I do want to add something in that space around the rest of the room, but I’m just not sure what yet. Maybe giant confetti shapes or something fun like that!

And that’s our office! Finally functional and a little bit stylish. Like I mentioned, there is room to improve and add over the duration of our time in 816, but just the progress we’ve made is so worth sharing!

Have you overhauled any rooms lately? Discovered any floors you didn’t know existed?